スマレジエンジニアyushiのブログ

スマレジエンジニアのブログ

デスク紹介

最近キーボードを新調したりしていたので、初めてですがデスク紹介をしてみようと思います。
私はあまりガジェット類に通じていない方なのですが、その分比較的王道なラインナップになっているかなと思います。
誰かの参考になれば嬉しいです。

概要

下記のような構成になっています。

PC Macbook Pro 16インチ 2021
キーボード HHKB Professional HYBRID Type-S 英語配列
トラックパッド Apple Magic Trackpad
モニター IO DATA 4K Type-C 27inch
PCスタンド BoYata PCスタンド
デスクマット サンワダイレクト デスクマット フェルト 60×30cm

Macbook Pro 16インチ 2021

会社支給のPCです。
スマレジでは、エンジニアには同等のスペックのPCが貸し出されます。
通常の開発をする範囲では、性能は申し分ないと思ってます。
数年ごとに交換してもらえます。

HHKB Professional HYBRID Type-S 英語配列

言わずと知れたHHKBです。

つい最近購入したのですが、とてもお気に入りです。
最近までは、60%・メカニカル赤・日本語配列のゲーミングキーボードを使っていましたが、打鍵音の大きさやキーマップに関する問題がありました。
エンジニアのユーザーがとても多い安心感と、レンタルした時の音の静かさや打鍵感の良さ、十分なキーマップ性能を確かめた上で購入しました。
買ったばかりと言うこともありますが、本当に「タイピングが楽しい」という感覚を味わえています。

下記のサイトでレンタルをしました。
事前に十分試して安心の上購入ができたことはもちろん、期間限定のようですがクーポンも付いておりレンタルしない場合と変わらない金額で購入できました。
宅配便でやり取りするだけでとても簡単なので、おすすめです。

geo-arekore.jp

Apple Magic Trackpad

Apple純正のトラックパッドです。

以前まではトラックボールを使っていたのですが、下記の問題がありました。

  • マウスホイールがおかしくなってしまった
  • 私の環境ではボタン割り当てがうまく動作しなかった
  • 右手を定位置に置かないと使えないのがたまに不便
  • 持ち運びに嵩張る

結局一番良いかと思いトラックパッドを購入しました。
上記の問題が解決したので購入してよかったです。
ただトラックボールに比べると手首の負担が大きく、慣れるのか心配しています。

IO DATA 4K Type-C 27inch

【自作ブログ #16】デザイン調整

自作ブログを作っています。

yushi-dev.hatenablog.com

技術スタック

  • TypeScript
  • React
  • Next.js
  • Styled Components
  • GitHub Pages

今回からデザイン調整を行います。
まずはResponsive対応を行います。

Responsive対応

Responsive対応、すなわち表示端末の画面サイズに応じて表示を切り替える対応を行います。

今回は、PC画面・iPad画面・スマホ画面を目安にした3つのサイズに対応します。

現在は幅が飛び出すような表示になってしまっています。

下記のように対応しました。

PC画面

iPad画面

スマホ画面

コード

適用したのは下記のコードです。

const GAP = '50px'
const SIDE_MENU_FULL_SCREEN_WIDTH = '240px'
const SIDE_MENU_TABLET_WIDTH = '180px'

const StyledContainer = styled(Container)`
  display: flex;
  justify-content: space-between;
  flex-shrink: 0;
  gap: 50px;
  gap: ${GAP};
  padding: 0 ${VERTICAL_PADDING};
`

const StyledMain = styled.main`
  width: calc(100% - ${GAP} - ${SIDE_MENU_FULL_SCREEN_WIDTH});
  @media (max-width: ${TABLET_MAX_WIDTH}) {
    width: calc(100% - ${GAP} - ${SIDE_MENU_TABLET_WIDTH});
  }
  @media (max-width: ${MOBILE_MAX_WIDTH}) {
    width: 100%;
  }
`

const StyledSideMenu = styled(SideMenu)`
  width: 240px;
  @media (max-width: ${TABLET_MAX_WIDTH}) {
    width: ${SIDE_MENU_TABLET_WIDTH};
  }
  @media (max-width: ${MOBILE_MAX_WIDTH}) {
    width: 100%;
  }
`

const MainContainer = ({ children, matters }: Props) => {
  return (
    <StyledContainer>
      <StyledMain>{children}</StyledMain>
      <StyledSideMenu matters={matters} />
    </StyledContainer>
  )
}

Pull Request

https://github.com/nek0meshi/blog/pull/21

あとがき

次回はその他のデザイン調整を行なっていきます。

HHKBのキーボードをレンタルしてみました。
機種はHHKB Professional HYBRID Type-Sです。
打鍵感が最高に良い上、かなり静かで周りに迷惑をかけづらくいい感じです。
下記のサイトでレンタルしました。
https://geo-arekore.jp/product/pfu-pd-kb800bs. 購入を検討中です。

【コンポーネント #4】Buttonコンポーネントを作る

引き続きComponentライブラリを作っていきます。

yushi-dev.hatenablog.com

技術スタックは下記の通りです。

  • TypeScript
  • React
  • Bulma
  • vite
  • Bulma
  • Storybook
  • ESLint
  • Prettier
  • asdf

Buttonコンポーネントを作る

HTMLの <button /> に対してBulmaでデザイン装飾をしたり、イベントハンドリングを簡易に行えるようにします。

bulma.io

まずは装飾のための型を定義します。
それぞれ、Bulmaでボタンの色・サイズを指定する時のclass名と一致させています。

type ButtonColor = 'is-primary' | 'is-warning' | 'is-danger'
type ButtonSize = 'is-small' | 'is-normal' | 'is-medium' | 'is-large'

<button /> のtype(button/submit)を指定するための型も定義します。

type ButtonType = 'button' | 'submit'

Buttonコンポーネントの引数のinterfaceを定義します。

interface Props {
  children: ReactNode
  className?: string
  color?: ButtonColor
  isOutlined?: boolean
  onClick: () => void
  size?: ButtonSize
  type?: ButtonType
}

先ほど定義した型を利用するcolor/size/typeの他に下記の引数を用意しました。

  • children: Buttonコンポーネントの内部の表示を渡す
  • className: 親から渡すクラス名
  • isOutlined: 枠表示の装飾を適用するかどうかのクラス
  • onClicked: クリックイベントのハンドラ

最後にButtonコンポーネント本体を作成します。
前回作成したuseClassName hookを利用し、デザイン装飾に関する引数を適宜加工しつつ_classNameとしてまとめます。

export const Button = ({
  children,
  className,
  color,
  isOutlined = false,
  onClick,
  size,
  type = 'button',
  ...props
}: Props) => {
  const _className = useClassName(
    className,
    'button',
    color,
    isOutlined && 'is-outlined',
    size,
  )

  return (
    <button className={_className} onClick={onClick} type={type} {...props}>
      {children}
    </button>
  )
}

storyの作成

動作を確認するためにStorybookのstoryを作ってみます。

今回は、Storybook導入時に自動で作成されるstoryを元に簡易に作ってみました。

(Button.stories.ts)

import type { Meta, StoryObj } from '@storybook/react'

import { Button } from './Button'

const meta = {
  title: 'Components/Button',
  component: Button,
  parameters: {
    layout: 'centered',
  },
  tags: ['autodocs'],
} satisfies Meta<typeof Button>

export default meta

type Story = StoryObj<typeof meta>

export const Default: Story = {
  args: {
    children: 'Button',
  },
}

動作確認をしてみます。

Storybookが引数を認識して自動で表示切り替えの仕組みを作ってくれています。   無事にBulmaのクラスを適用できているようです。

あとがき

最近は機能開発のかたわらで業務のアジャイル化に取り組んでいます。
また始まったばかりですが、効果が出そうな感触があって楽しみです。

トラックボールを使っていたのですが、少々の不都合がありトラックパッドを買ってみました。
こちらも今後の活躍が楽しみです。

【コンポーネント #3】CIの導入・ClassName管理のHook化

引き続きComponentライブラリを作っていきます。

yushi-dev.hatenablog.com

技術スタックは下記の通りです。

  • TypeScript
  • React
  • Bulma
  • vite
  • Bulma
  • Storybook
  • ESLint
  • Prettier
  • asdf

Prettier・CIの導入

プロジェクトを作ったらとりあえずPrettierを入れておきます。

npm i -D prettier

prettierの設定ファイルを導入します。

semi: false
singleQuote: true

package.json に登録します。

"scripts": {
  "prettier": "prettier -c .",
  "lint": "npm run eslint && npm run prettier",
}

CIで実行されるようにします。

name: Inspection

on:
  pull_request:
    branches:
      - master

jobs:
  frontend-lint:
    runs-on: ubuntu-latest
    steps:
      - uses: actions/checkout@v3
      - uses: actions/setup-node@v3
        with:
          node-version-file: '.tool-versions'
          cache: 'npm'
          cache-dependency-path: 'package-lock.json'
      - run: npm ci
      - run: npm run lint

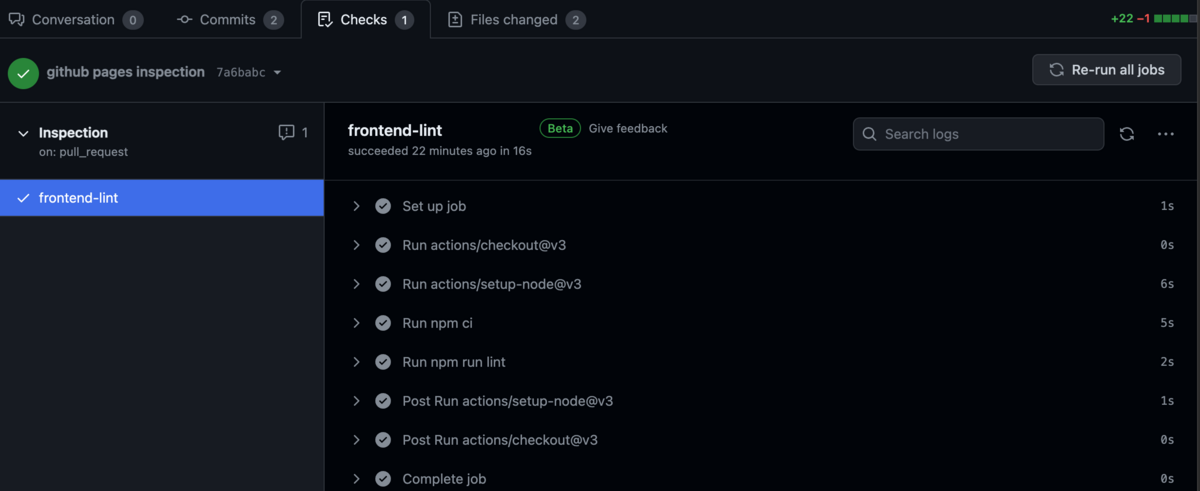
Pushすると、無事に実行されました。

Pull Request

ClassName 管理用のHookの追加

React Componentを作成するとき、必ずclass要素(React上ではclassName)の管理が必要になります。

便利なライブラリがあるので、まずは導入します。

npm i --save clsx

github.com

Hookにまとめて抽象化します。

import { useMemo } from 'react'
import clsx from 'clsx/lite'

export const useClassName = (
  ...classNames: (string | undefined | false)[]
): string => {
  return useMemo(() => clsx(...classNames), [classNames])
}

下記のように利用できます。

export const Button = ({
  children,
  className,
  isOutlined = false,
  onClick,
  size,
}: Props) => {
  const _className = useClassName(className, 'button', isOutlined && 'is-outlined')

  return (
    <button className={_className} onClick={onClick} >
      {children}
    </button>
  )
}

Pull Request

https://github.com/nek0meshi/components/pull/9

あとがき

業務の開発ではReact・jQuery・AngularJSを交互に触るので不思議な気持ちです。

先日は推しの子展を観にいきました。大好きなアニメ・漫画なので、とても感激しました。

oshinoko-butaiura.com

【コンポーネント #2】依存ライブラリの導入

引き続きComponentライブラリを作っていきます。

yushi-dev.hatenablog.com

TypeScriptとReactベースで、CSSはBulmaを利用します。 下記のツール等を利用します。

  • TypeScript
  • React
  • Bulma
  • vite
  • Storybook
  • ESLint
  • Prettier
  • asdf

Storybookの導入

下記のコマンドを実行します。

npx storybook@latest init

依存ライブラリが導入されます。

  • @storybook/addon-essentials
  • @storybook/addon-interactions
  • @storybook/addon-links
  • @storybook/addon-onboarding
  • @storybook/blocks
  • @storybook/react
  • @storybook/react-vite
  • @storybook/test
  • eslint-plugin-storybook
  • storybook

storybook 本体のライブラリの他、
React・Vite・ESLint 関連のライブラリが導入されました。

ESLint の設定ファイルで、storybook用の設定がextendsされます。

(.eslintrc.cjs)

extends: [
+ 'plugin:storybook/recommended',
],

設定ファイルである.storybook/main.ts.storybook/preview.ts が作成されます。

src/stories 以下に例のstorybookのコードが作成されます。
これらは不要のため削除します。

Pull Request

https://github.com/nek0meshi/components/pull/3

Bulmaの導入

下記のコマンドを実行します。

npm i bulma

ライブラリ・storybookのそれぞれのコードでCSSを導入します。

(src/main.tsx, .storybook/preview.ts)

import '../node_modules/bulma/css/bulma.css'

動作確認のため、stories ファイルを書き換えて適用してみます。

-  size?: 'small' | 'medium' | 'large';
+  size?: '' | 'small' | 'normal' | 'medium' | 'large';

export const Button = ({
-  size = 'medium',
+  size = '',
}: ButtonProps) => {
-  const mode = primary ? 'storybook-button--primary' : 'storybook-button--secondary';
+  const mode = primary ? 'button is-primary' : 'button is-light';

   return (
     <button
       type="button"
-      className={['storybook-button', `storybook-button--${size}`, mode].join(' ')}
+      className={[`is-${size}`, mode].join(' ')}
       style={{ backgroundColor }}
       {...props}
    >
      {label}
    </button>
  );
};

Pull Request

https://github.com/nek0meshi/components/pull/4

storiesの削除

例のstoriesファイルは不要なので削除します。

rm -r src/stories

Pull Request

https://github.com/nek0meshi/components/pull/5

あとがき

弊チームは今月から月の半分は出社になりました。
いろんな人と話す機会が増えるのが嬉しいです。
ただ慣れないので少し大変です。

【コンポーネント #1】ReactでComponentライブラリをつくってみる

今回よりComponentライブラリを作っていきます。

TypeScriptとReactベースで、CSSはBulmaを利用します。

その他には下記のツール等を利用します。

  • vite
  • Storybook
  • ESLint
  • Prettier
  • asdf

初期準備

まずasdfでnode.jsのバージョンを固定します。

node.jsのバージョンは、現在のLTSである20を指定します。

nodejs.org

asdfでNode.jsをインストールし、バージョンを固定します。

asdf-vm.com

asdf local nodejs 20.9.0

記述ルールを統一するために、.editorconfigを用意します。

(.editorconfig)

# EditorConfig is awesome: https://EditorConfig.org

root = true

[*]
indent_style = space
indent_size = 2
end_of_line = lf
charset = utf-8
trim_trailing_whitespace = true
insert_final_newline = true

[Makefile]
indent_style = tab

[*.md]
trim_trailing_whitespace = false

プロジェクト作成

React + TypeScriptでプロジェクトを作成します。

Viteでプロジェクトを作成します。

ja.vitejs.dev

npm create vite@latest components -- --template react-ts

プロジェクトを作成します。

(package.json)

{
  "name": "components",
  "private": true,
  "version": "0.0.0",
  "type": "module",
  "scripts": {
    "dev": "vite",
    "build": "tsc && vite build",
    "lint": "eslint . --ext ts,tsx --report-unused-disable-directives --max-warnings 0",
    "preview": "vite preview"
  },
  "dependencies": {
    "react": "^18.2.0",
    "react-dom": "^18.2.0"
  },
  "devDependencies": {
    "@types/react": "^18.2.43",
    "@types/react-dom": "^18.2.17",
    "@typescript-eslint/eslint-plugin": "^6.14.0",
    "@typescript-eslint/parser": "^6.14.0",
    "@vitejs/plugin-react": "^4.2.1",
    "eslint": "^8.55.0",
    "eslint-plugin-react-hooks": "^4.6.0",
    "eslint-plugin-react-refresh": "^0.4.5",
    "typescript": "^5.2.2",
    "vite": "^5.0.8"
  }
}

依存ライブラリをインストールします。

npm i

Viteの開発サーバーを起動します。

npm run dev

Pull Request

https://github.com/nek0meshi/components/pull/2

あとがき

今回はプロジェクト作成まで行いました。
次回以降はStorybookやBulmaを導入したり、コンポーネントを作っていきます。

最近はずっとダウ90000にはまっています。 ネタを見たり、ラジオを聴いています。

youtu.be

【自作ブログ #15】GitHub Pagesでの公開(2)

自作ブログを作っています。

yushi-dev.hatenablog.com

技術スタック

  • TypeScript
  • React
  • Next.js
  • Styled Components
  • GitHub Pages

今回はGitHub Pagesでの公開のための修正などをしていきます。

画像が表示されない問題

前回も言及した通りですが、GitHub Pagesの場合パスが下記のようになります。

https://[user-name].github.io/[repository-name]

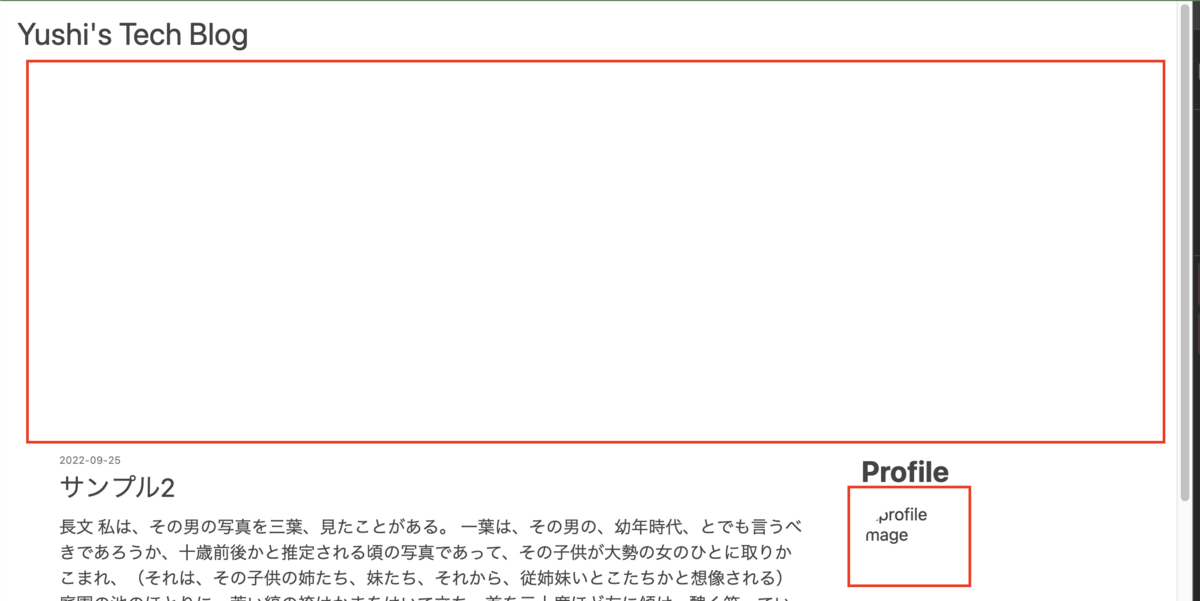
このために、GitHub Pages上で画像が表示されない問題が発生してしまいました。

この解決のため、URLにbasePathを付与するメソッドを作成しました。

まず、next.config.js にbasePathを登録します。

const basePath = process.env.BASE_PATH ? '/' + process.env.BASE_PATH : ''

const nextConfig = {
  publicRuntimeConfig: {
    basePath,
  },
}

この設定値を利用するメソッドは下記です。

import getConfig from 'next/config'

export function url(path: string): string {
  const { publicRuntimeConfig } = getConfig() as {
    publicRuntimeConfig: { basePath: string }
  }

  return publicRuntimeConfig.basePath + path
}

最後に、これを利用した画像が表示できるように修正します。

(pages/index.tsx)

import { url } from '@/utils/config-utils'

const heroBackgroundImageUrl = url('/hero.jpg')

const HeroContainer = styled(Container)`
  height: 400px;
  margin: 0 auto;
  - background-image: url('/hero.jpg');
  + background-image: url(${heroBackgroundImageUrl});
  background-position: center;
  background-size: cover;
`
(SideMenu.tsx)

<StyleImage
  layout="fixed"
  - src="/profile.png"
  + src={url('/profile.png')}
  alt="profile image"
  width={imageSize}
  height={imageSize}
/>

リンクが正しくない問題

同様に、リンクが正しくない問題があります。

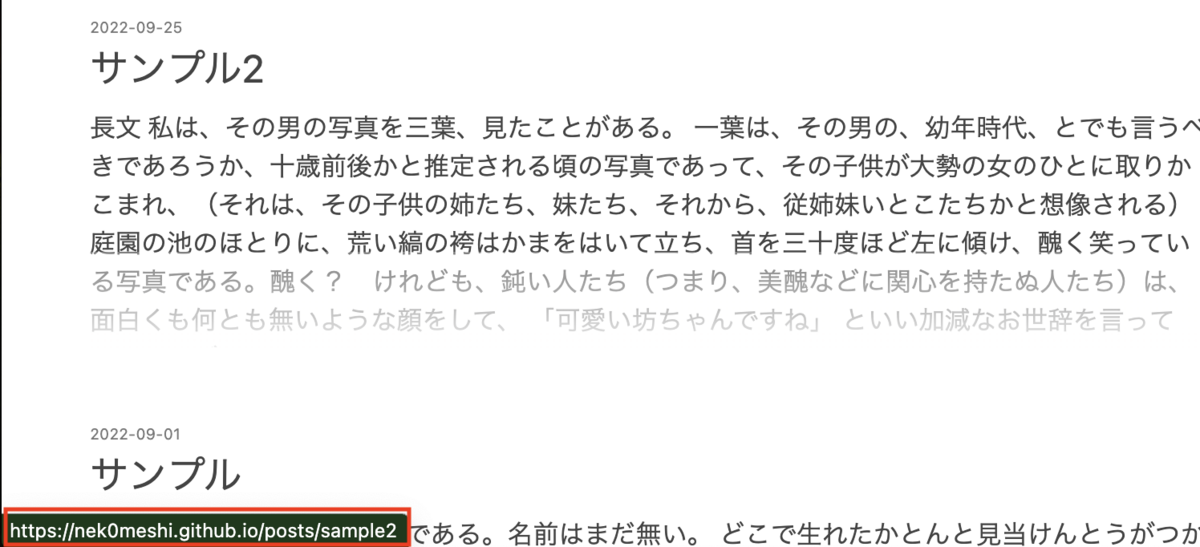
https://nek0meshi.github.io/posts/sample2

となっていますが、正しくは下記です。

https://nek0meshi.github.io/blog/posts/sample2

こちらの問題は、単に next/Link を利用することで修正できました。

const TopNav = ({ text, href }: Props) => {
  - return <A href={href}>{text}</A>
  + return (
  +   <Link href={href} passHref>
  +     <A>{text}</A>
  +   </Link>
  + )
}

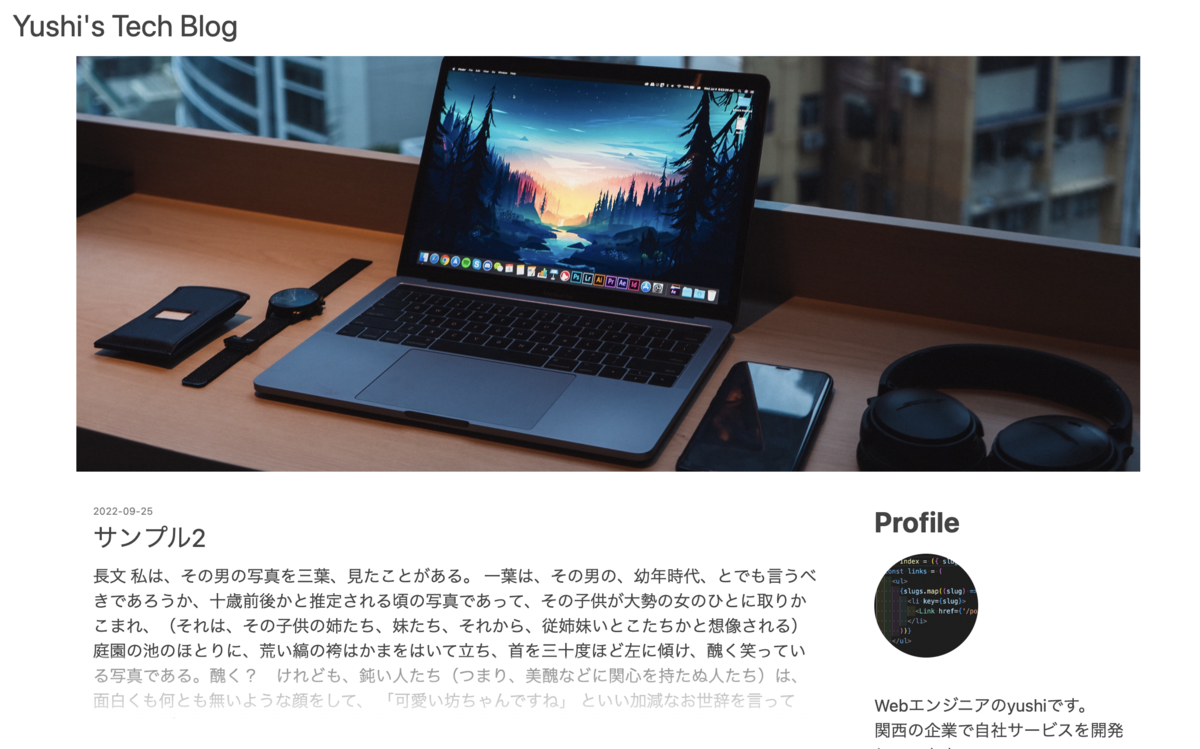
スクリーンショット

Pull Request

https://github.com/nek0meshi/blog/pull/17

あとがき

またしても体調を崩してしまいました...。

体を強くしたいです。